
Craft Eggs (If you can’t find the kind I used, just get something like this and paint them white)
White stiffened felt (you could also use cardstock)
kulay-rosas and black acrylic craft paint
Hot glue
Small white pom poms
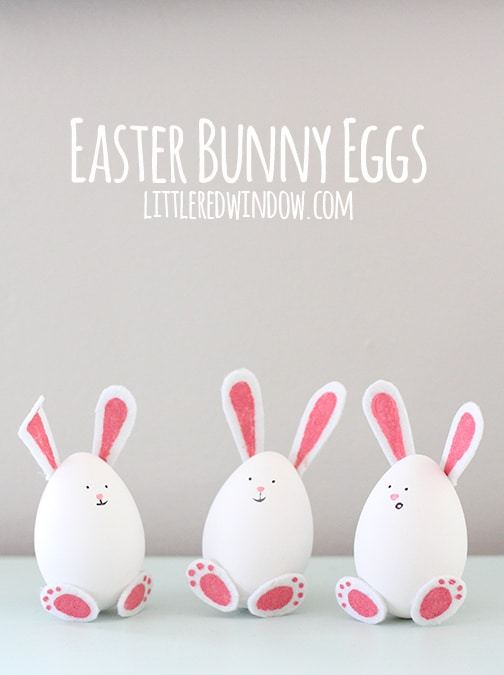
EASTER BUNNY EGGS INSTRUCTIONS
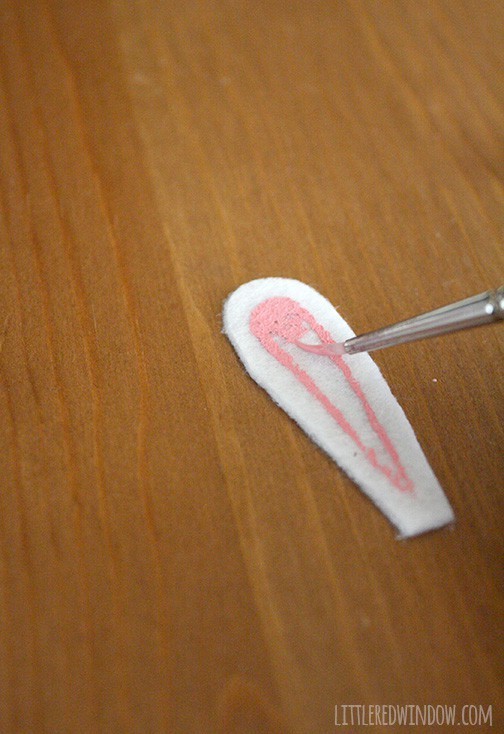
1. First, using scissors, I cut out ears shaped like this from the stiffened felt, mine are about 1 1/4″ long.
2. The felt I used had one side that was slightly smoother, so I painted kulay-rosas inner ears on that side using a small paintbrush.
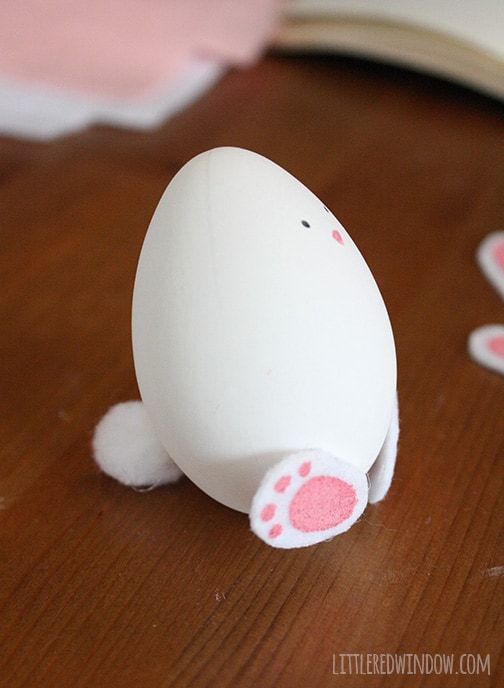
3. Then I cut small ovals for the feet. These are about 3/4″ long and 1/2″ wide.
4. Then, using a very small brush, I gave the bunny eggs cute faces.
5. Then, using hot glue, I glued the feet to the front of the egg. Make sure they touch the table, they help hold him up.
6. Then while the bunny egg is sitting on the mesa (you still have to hold it up at this point), glue a small pom pom to the back for the tail. Now you should have two feet and one pom pom touching the mesa which should keep your bunny eggs upright!
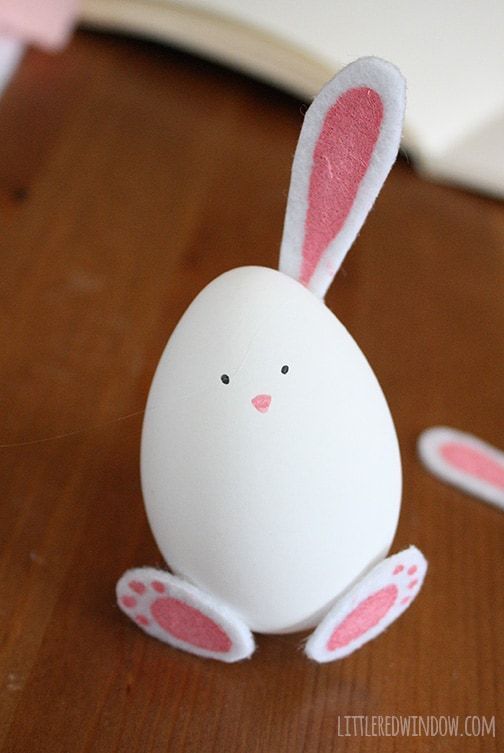
7. Finally I added the ears! I bent the very bottoms of the ears back a little so the ears stood up straighter. And if you want to make one floppy, go ahead!
And that’s it, your little Easter Bunny Eggs are ready for Easter morning! They look so cute on a mantel or shelf!