

Before we get started, I'd like to introduce the reader to the preferable programs, although I'm sure one could improvise this tutorial into their own program.
The first one I'll use is called paint.net.
Paint.net is pretty much your typical XP MS Paint, but with a few extra features, such as layers, transparency, and some fancy effects. For this, we'll keep it pretty simple and only use the first two of those listed extras.
The other program we'll be using is GIMP 2.6. Other versions of GIMP can be used, of course, but seeing as I am unfamiliar with those, you may need to improvise on your own.
First off, you should do a rough sketch of the character you wish to draw. This can be on paper, or on the computer.
If you're doing this on computer, then I suggest opening paint.net and sketching on Layer 1 in a light blue, red, any colour except black, because that is what we're going to use for the lineart later on.
On the other hand, if you've sketched on paper, take a litrato or scan that into your computer, and open it with paint.net. Assuming you've used grey leaded pencil for the sketch, it may be a little dark- You want to have a light sketch, although not so light you can't see it. If you go to |Adjustments| |Brightness / Contast| you can edit how bright the picture is.
Because I'm lazy, I'm not going to bother posting an image of the sketch, and we're going to ilipat straight to the lineart.
Once you have your sketch, add a new layer to your picture. On this new layer, I like to use a size 2 brush to do my lineart. Because I use a mouse, I use the line/curve tool, but for tablet users, you can improvise with that.
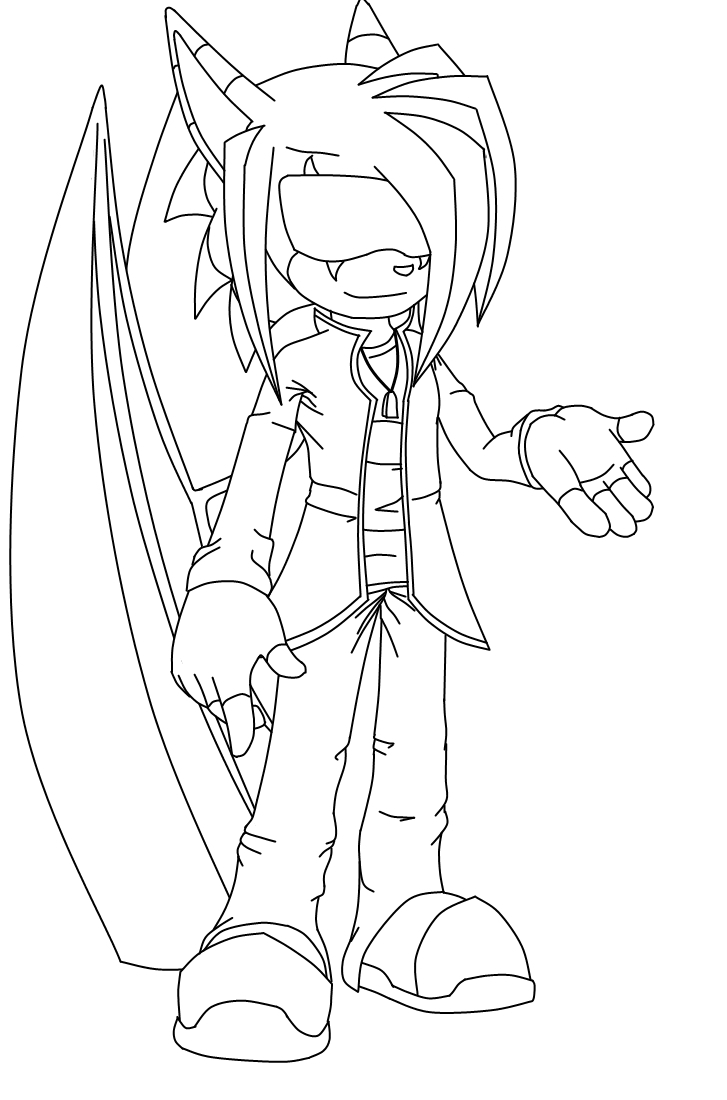
That is my current lineart stage- Although, because this must be a JPEG to upload into an article, I had to get rid of the transparency. You should save it as either a .pdn or .tiff file to preserve transparency when working.
What I do next, is change my line/curve tool to a size 3 brush, and go around ONLY the outside line of the picture, to silhouette it in. This takes madami time and you'll need to have some patience to do it, but it makes the picture look a lot cleaner, crisper, and madami professional.
At this point, you may also want to alisin your sketch layer. This stage should be done solely on the one layer, with a transparent background.
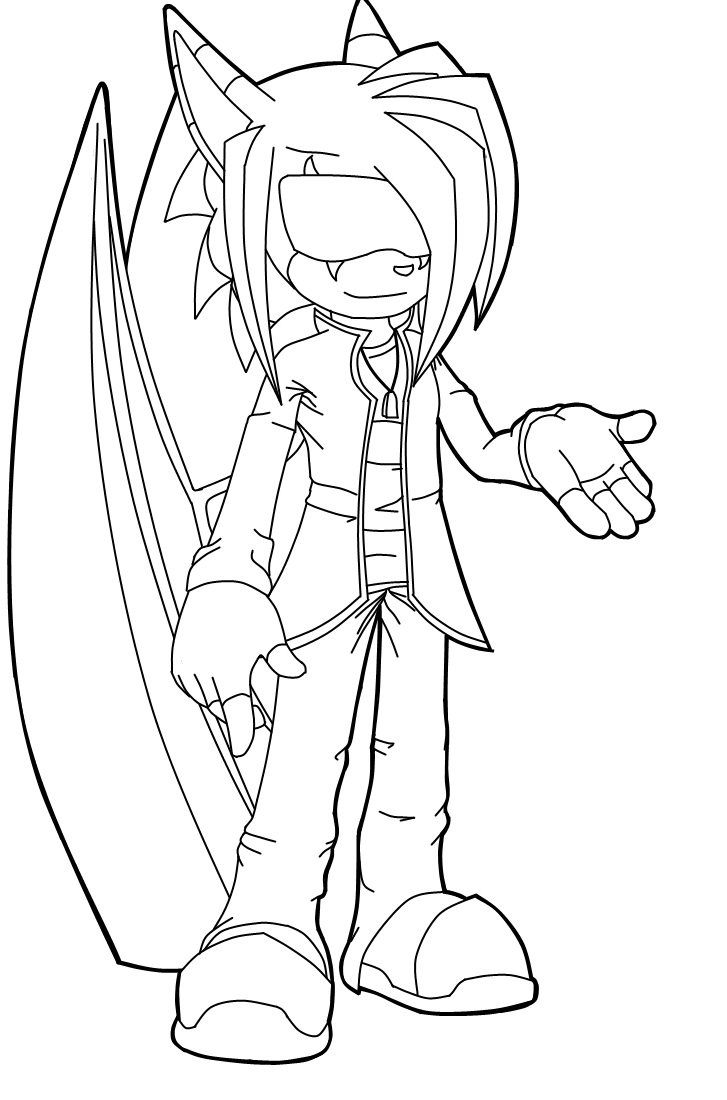
This is what my lineart looks like after I've done that. It looks much nicer, and will make for a much madami striking image when coloured and finished.
That ends the stage of lineart. So, now, we want to colour it!
But first, you'll need to save your work.
If you haven't already, alisin any unwanted layers and compress the needed ones, until you have ONLY one layer- Your lineart, on a transparent background.
You CAN save this as a JPEG, but I prefer not to- JPEG files have horrible quality and it'll make colouring it in a lot harder. Instead, I save it as a .tiff file.
Exit paint.net, get your file, and open it in GIMP.
First things first. I like to start with the background- It makes 'smoothing' the character in much easier later on. Give a light source, or if you want to, several. Keep in mind this will effect your shading later on.
To make a background, add a layer, and stack it BEHIND your lineart.
When doing your background, you may want to download some effect brushes- For this, I used a glow brush for the green, and a grudge brush with low opacity for the white.

And there it is. A quick, easy-to-make, but pretty background. I used a total of three layers for that, and then compressed them into one.
Now that's all well and good... But it could look nicer. So we'll add some foreground lights, on a layer above the lineart. You can mess with the opacity of the extra lights layer for better effects.

Here it is so far. I used a three different sparklies brushes on a low layer opacity. This layer, as said, is stacked ABOVE the lineart. This will add a nice glow to the picture later on.
Now, we begin the actual colouring itself.
I use the pencil tool to colour in the picture, on a new layer underneath the lineart, but above the background. As I go, I shade using a black airbrush tool set at low opacity, and a lighter shade of the in-use colour for highlights. Add and merge the colour layers as you go.
A helpful hint for when shading, is to use the Magic Wand tool, aka the Fuzzy Select tool, to choose the area in use before starting.
Once you've finished with colouring and shading, merge all your layers into one, and at long last, save your drawing as a JPEG file. And then it's ready to upload!
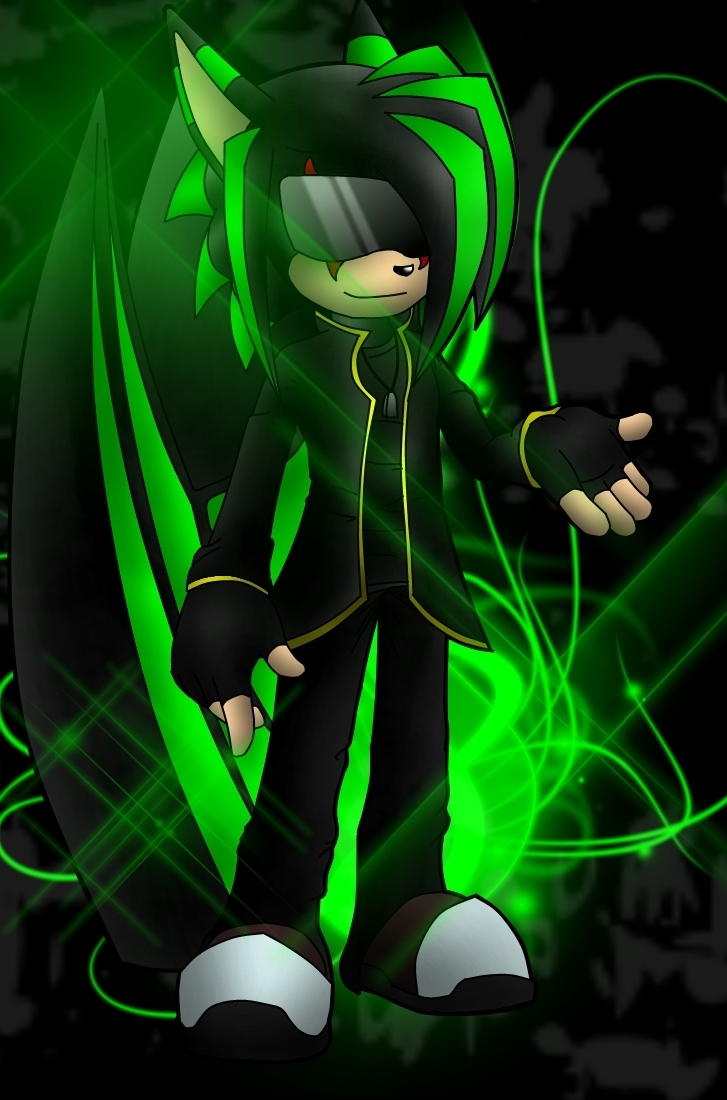
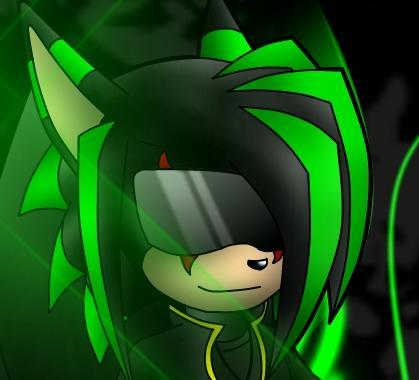
And here we have the finished product of your hard work!
Hope this tutorial helped, and if you've got any further tanong as to how I work, feel free to ask.
Danny the hedgehog
Species: Hedgehog
Sex: Male
Hight: 3.3 ft
balahibo color: Blue and Purple
Shoes: Black boots with a light blue tip
eye color: Blue
Family:...dont ask him, hes whole family died
Power: Controls all matter
Things he likes: Running, relaxing, Reading, uses power to save his friends...it happens all the time, being with Ame.
Things he hates, Death, Fighting, Evil, That freaken Blue running version of him..sorry to all the sonic fans, guns, seeing ppl sad.
Skills, Sword fighting, using matter, landing perfectly, helping ppl out.
Short bio: After his whole family died he had 2 save someone that was trapped inside a rose for 200 yrs and reclaim his broken, pointless life and help her out of the rose.
hi guyz im bak. sum1 ban me so i make new acount. i also hav english lesons now!11
i may make the od typo but dont buly me plz.
aslo wat iz up with ppl hateng reclors?? i luv thm so evry1 shud luv them. spred teh luv <3333
this acont also gut baned but itz unbannd now so im bakc! :) but if u ban me agen i wil kepp comign bakc so no madami ban plaese?
i wil continu to maek charicters and u wil luv them all! i will ibigay sum of them soon they are soooooooo kawaii =^_________________^=
i hope no 1 bans me again bcuz i done noting rong.
if u do ban me i wil get u nd it wil nut b pritty.
i luv u all. but ppl with orignal charcters must haet recolors so i dun liek you ppl who try hard wen yuo maek chars.
c u arond the culb!111
Age:19
Gender: female
Race:Squirrel
DARK, HERO, NEUTRAL: hero
Special Power (if any): nothing unique
*Flight, Speed, or Power: Power
Silly was born into a family of pirates, and most of her life was spent on the family ship, named the Crusader with her father's crew, the Straw Hats. she has two brothers that are twins, Monkey and Brick. she has one older sister, who is now the captain of the Straw Hats, Lilly Crusader. Silly has excellent fighting skills, and is pretty good with a hand gun. right now, she lives in London, England with her friend Shadow DCE. until Lilly decides Silly is ready to take over as captain, Silly will be a member of the chaotix. her best friend is Vector. as you might of guessing, adores sailing of any kind.
Sandy meets up with us. "hi, sis" sandy says
"hi" Cream and me head into the vents "so ruby you're a spy" cream says "yea, cream be quiet they will know we're here" "sorry" "it's ok" then we here eggman talking "sh" i say to cream. she just nods I crawl onto the vent hole I see sandy walking in. "who are you" eggman says there was no answer from sandy "answer me" eggman says "sandy" then i see sonic and tails stealing the chaos emeralds "what, sonic" eggman says I see the other chaos emeralds and drop down and take them then emma drops down in front of me "ruby give me those emeralds" "never, traitor" I scream at her I run out of eggmans base and meet up with Sandy, Sonic, Tails, and Cream. "did we get all of them" I ask "I think" tails sinabi I give the chaos the two chaos emeralds to sonic "thanks" Sonic says "bye, everyone" I say
"where are you going" cream ask "any where I can go" I walk of not knowing this wasn't over.